


Funduino Joystick Shield for Arduino Uno — Dual Joystick, 4 Buttons, Bluetooth Ready
Funduino Joystick Shield for Arduino Uno Dual Joystick, 4 Buttons, Bluetooth Ready
Compatible JST cables for sensors and modules — secure & reliable. Shop now.

Couldn't load pickup availability
Funduino Joystick Shield for Arduino Uno — Dual Joystick, 4 Buttons, Bluetooth Ready
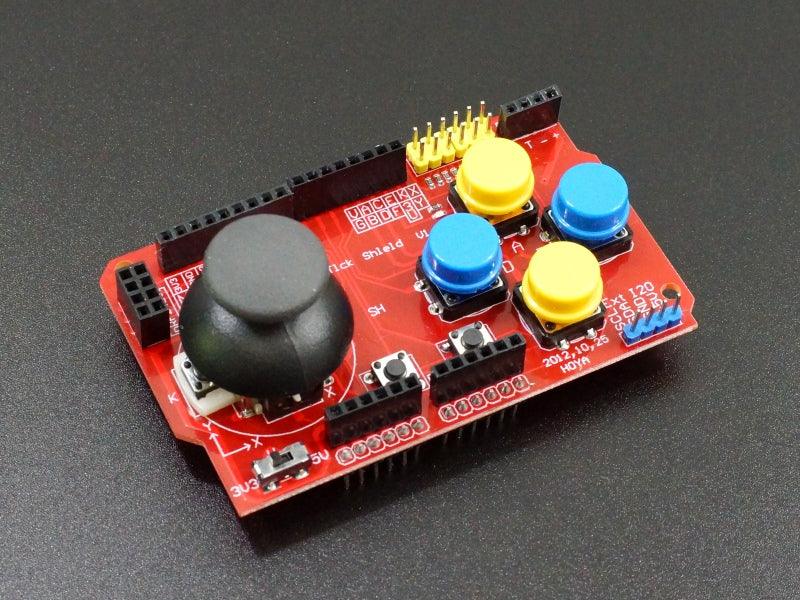
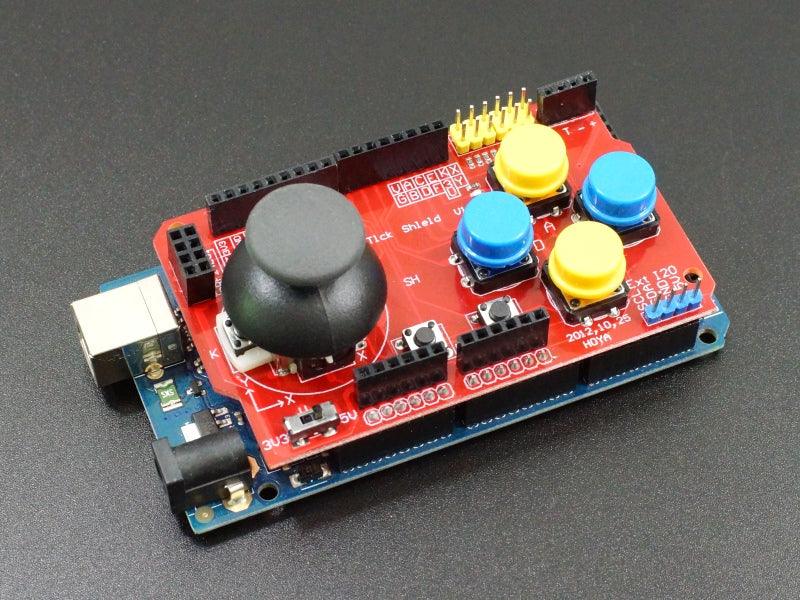
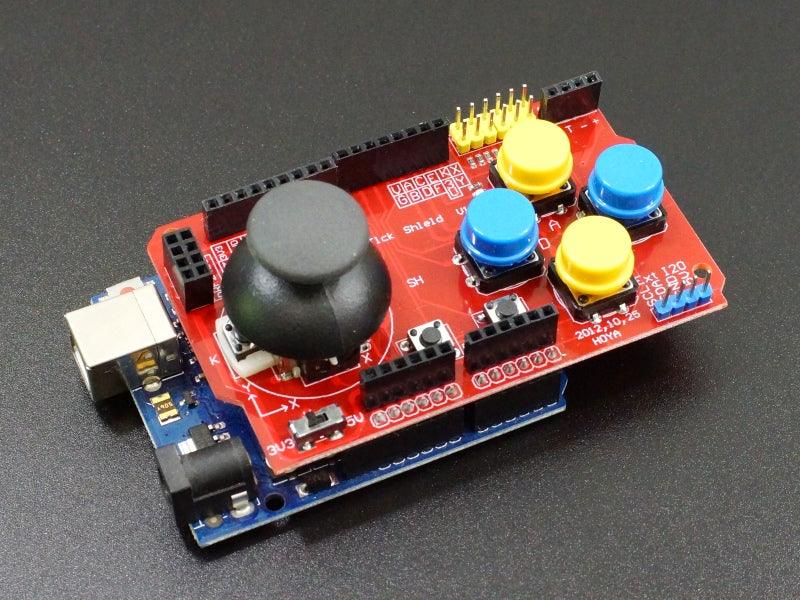
The Funduino Joystick Shield stacks directly onto an Arduino Uno and provides a complete game controller input interface: two analog joysticks (X/Y axis each), four pushbuttons, and a socket for a Bluetooth module (HC-05/HC-06) for wireless control. It's the fastest way to add game controller-style input to an Arduino project — no wiring required, just stack and code. Perfect for robot remote control, RC vehicles, and game projects.
Shield Specifications
- Compatible Board: Arduino Uno (standard shield form factor)
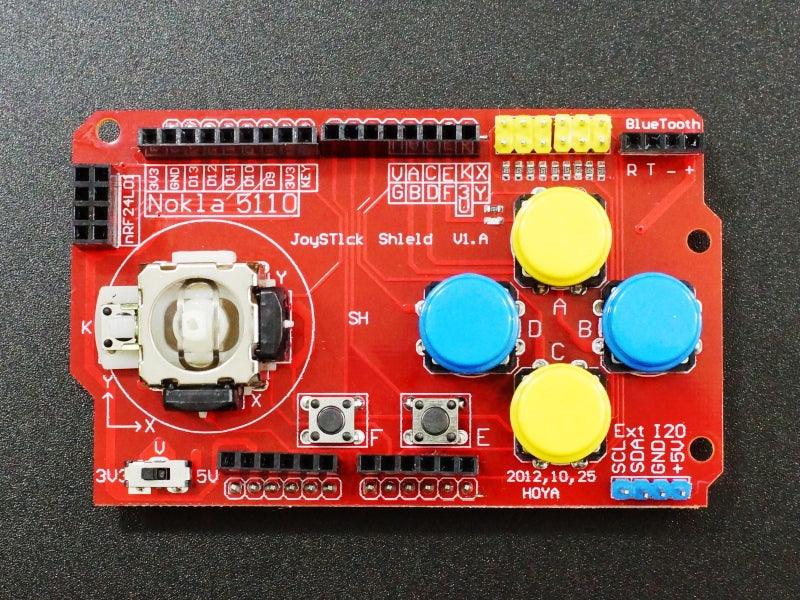
- Joysticks: 2 × dual-axis analog joystick (X/Y) with pushbutton (press to click)
- Pushbuttons: 4 × tactile pushbutton (A, B, C, D or directional)
- Bluetooth Socket: HC-05 / HC-06 compatible (4-pin: VCC, GND, TX, RX)
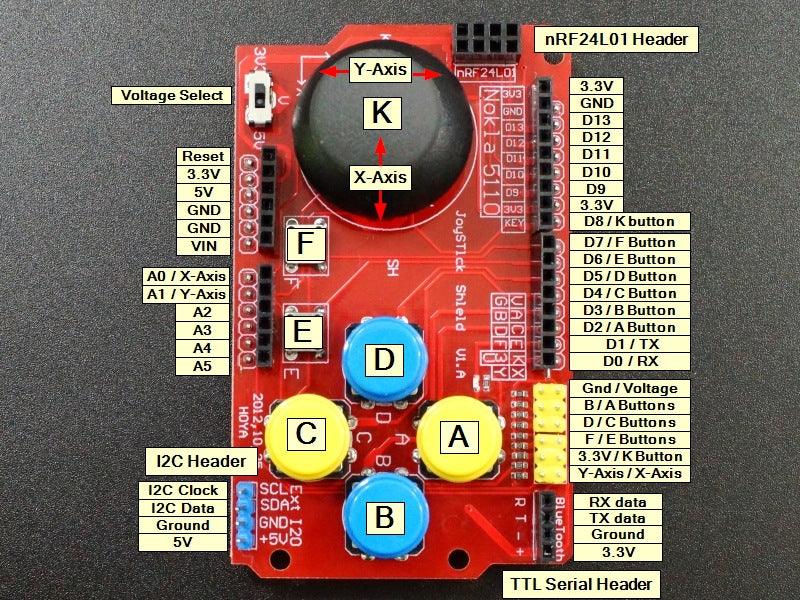
- Analog Pins Used: A0 (J1-X), A1 (J1-Y), A2 (J2-X), A3 (J2-Y)
- Digital Pins Used: D2–D6 (buttons and joystick press)
- Supply Voltage: 5V (from Arduino)
Joystick Output
- Each joystick outputs 0–1023 on X and Y axes (10-bit ADC via analogRead)
- Center position: ~512 on both axes
- Joystick press: digital LOW on assigned pin (with INPUT_PULLUP)
Typical Applications
- Robot remote control: Wireless joystick control of Arduino robots via Bluetooth HC-05
- RC vehicle control: Dual joystick throttle and steering for RC cars and boats
- Arduino game controller: Game controller input for Arduino-based games
- Pan-tilt camera: Joystick control of servo-based pan-tilt camera mounts
- Drone controller: Prototype drone controller with Arduino flight controller
Package Contents
- 1 × Funduino joystick shield for Arduino Uno
Stack directly on Arduino Uno — dual analog joystick, 4 buttons, Bluetooth socket. The complete game controller shield for robot remote control, RC vehicles, and Arduino game projects.

Blog posts
View all-

Best JST Connector Crimping Tools in 2026: Engi...
Choosing the wrong crimping tool ruins JST connectors and wastes wire. This guide compares the top crimping tools for JST SH, GH, PH, XH, and VH series — including Engineer...
Best JST Connector Crimping Tools in 2026: Engi...
Choosing the wrong crimping tool ruins JST connectors and wastes wire. This guide compares the top crimping tools for JST SH, GH, PH, XH, and VH series — including Engineer...
-

Molex KK 254 vs Mini-Fit Jr. vs Micro-Fit 3.0: ...
Choosing between Molex KK 254, Mini-Fit Jr., and Micro-Fit 3.0? This guide compares pitch, current rating, locking mechanism, wire gauge, and typical applications — with decision tables, part number references,...
Molex KK 254 vs Mini-Fit Jr. vs Micro-Fit 3.0: ...
Choosing between Molex KK 254, Mini-Fit Jr., and Micro-Fit 3.0? This guide compares pitch, current rating, locking mechanism, wire gauge, and typical applications — with decision tables, part number references,...
-

DuPont Connector vs JST PH 2.0: Pinout, Specs &...
Not sure whether to use a DuPont 2.54mm or JST PH 2.0mm connector? This guide compares pitch, locking mechanism, current rating, pinout, and best use cases — so you can...
DuPont Connector vs JST PH 2.0: Pinout, Specs &...
Not sure whether to use a DuPont 2.54mm or JST PH 2.0mm connector? This guide compares pitch, locking mechanism, current rating, pinout, and best use cases — so you can...


