- ★Product Description
- ★About us
- ★Custom cable
DESCRIPTION
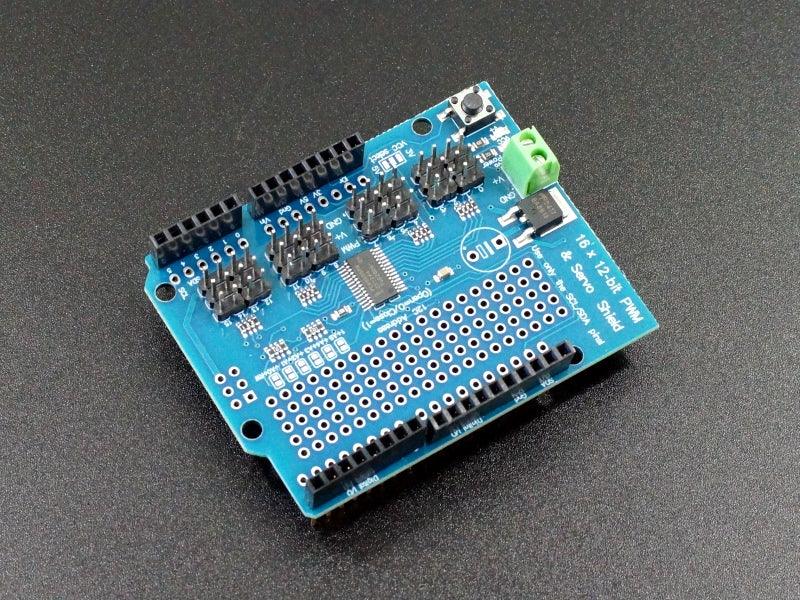
This 16-Channel PWM Servo Controller Shield brings the I2C bus up from the Arduino and coupled with a PCA9685 provides 16-channel 12-bit PWM. This can be used to drive up to 16 servo motors or LEDs.
PACKAGE INCLUDES:
- 16-Channel PWM Servo Controller Shield
KEY FEATURES OF 16-CHANNEL PWM SERVO SHIELD:
- 16 Channels of individually controllable PWM using PCA9685 Chip
- PWM / Ground / 5V pins for each servo
- I2C Interface
- 24Hz to 1.5KHz PWM frequency range w/ 12-bit resolution
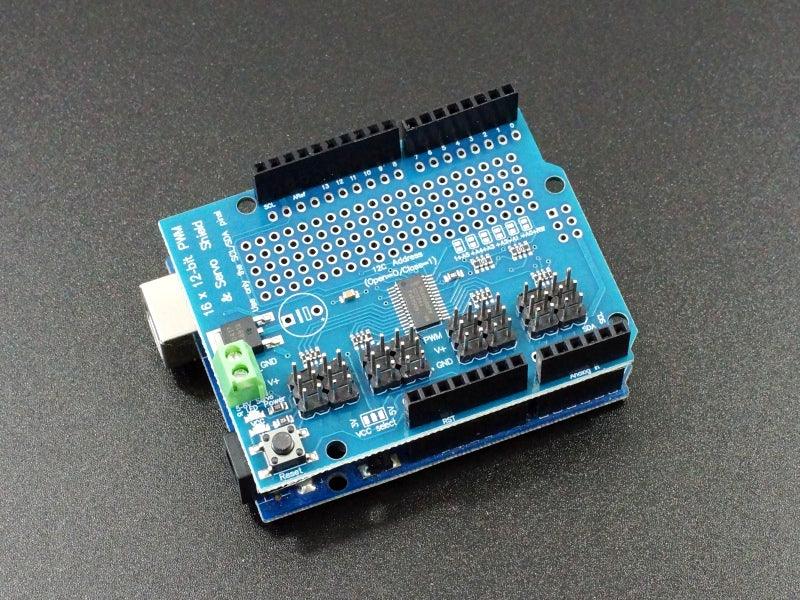
The shield is compatible with UNO, Mega, Leonardo and similar Arduinos. Since the shield operates from I2C, all of the Arduino pins remain available for other uses and are brought up to the top surface for easy access. In addition, there is a 5 x 20 perf board section for general prototyping.
Microcontrollers can drive PWM devices such as LEDs and servo motors directly, but they are limited in the number of devices that they can drive. This shield allow for a large number of PWM outputs using only 2 pins (I2C) on the MCU. It also off-loads some of the processing requirements from the MCU so that it can concentrate on other tasks. It also facilitates using external power to drive the servos which is important to avoid electrical noise affecting the MCU.
This 16-channel PWM controller is based on the PCA9685 chip. It is designed to provide up to 16 channels of PWM control that can be used for controlling brightness of LEDs or for driving servo motors. The module can be programmed with a PWM frequency from 24Hz up to 1.5KHz and each of the outputs has a 12-bit resolution. In addition, the channels can be programmed fully ON/OFF to use as general purpose digital outputs. They cannot however be used for inputs.
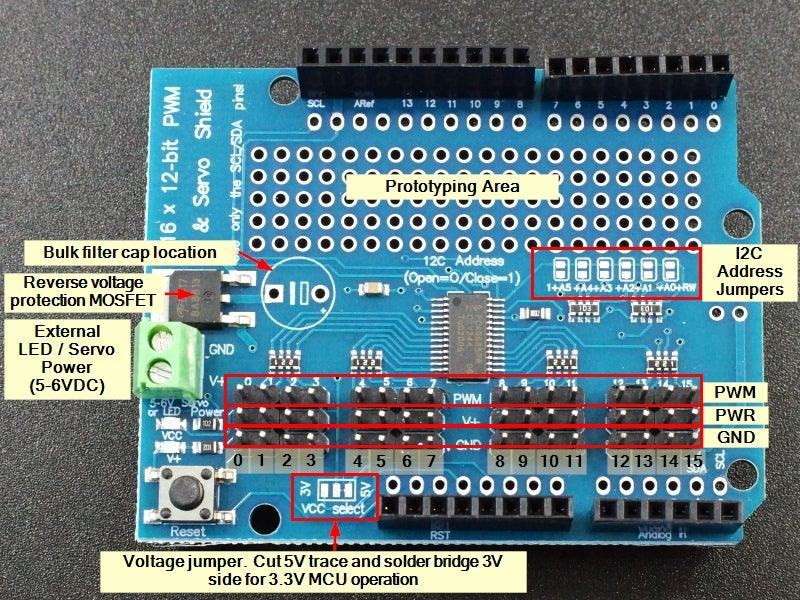
The controller sits at I2C address 0x40. There are 6 address select jumper locations labeled A0 – A5 that can be bridged with solder if a different address is needed due to a conflict or if multiple of these shield boards are being used. This is a binary address, so bridging A0 changes the address from 0x40 to 0x41 as shown below.
- Board 0: Address 0x40, no jumpers
- Board 1: Address 0x41, jumper A0
- Board 2: Address 0x42, jumper A1
- Board 3: Address 0x43, jumper A0 & A1
- and so on….
Board Connections:
1×2 Terminal Block (Motor Power Input)
This is the main power input when using with servos and is used to power the motors. This input has reverse polarity protection which may be a diode or a MOSFET transistor.
5V is typically applied to this connector. There is a red LED lit when power is applied to V+. There is a 2nd red LED lit when Vcc is applied to the module. You need both LEDs lit for the shield to operate.
Do not connect V+ to the Arduino 5V as the motors will create electrical noise that will cause issues for the Arduino. Also keep in mind the current draw of the servo motors that you select which can be quite high. Most Servos will draw at least 100mA or more each. If you are using this shield to drive LEDs, that can usually be done using the Arduino 5V as long as you stay within the current limits of the Arduino but larger arrays will require external power.
- GND = Ground for motor power supply.
- V+ = Voltage used to power Servo motors. 5V is typical and can be up to 6V
There is a spot to add a large electrolytic cap to V+ near the terminal block if additional filtering is needed.
Female Headers (Logic Connections)
- SCL = I2C Clock. Connects to SCL pin on MCU
- SDA = I2C Data. Connects to SDA pin on MCU
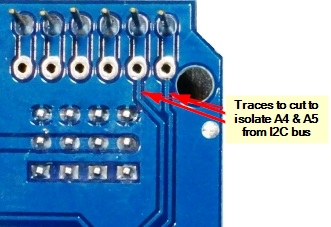
Note: For compatibility with older Arduinos that don’t have dedicated I2C lines, the SCL and SDA pins also connect to pins A4 and A5 which are used on the older boards for I2C. If you want to use A4 and A5 for other purposes with a newer R3 version Arduino, cut the traces to A4 and A5 on the back of the board to remove them from the I2C bus.
1×3 (x16) Male Headers (Servo Connections)
The output headers are numbered 0 thru 15 on the board. Each of these connections has the following pins.
- PWM = Connects to the PWM pin on the servo motor. Servo wire color may be orange, yellow or white.
- V+ = Connects to the power pin on the servo motor. Servo wire color is red
- GND = Connects to the ground pin on servo motor. Servo wire color may be brown or black
Note: If using the module with LEDs:
- LEDs connect between PWM and V+ with the cathode of the LED connecting to PWM. You can connect the LEDs the other way, but the PCA9685 is limited to 10mA source current in that configuration.
- All PWM pins have a 220 ohm resistor in series which limit current to about 15mA depending on the LED. These will typically work fine as current limiting series resistors when driving standard low power indicator type LEDs and will keep the total power dissipation of the PCA9685 device within spec if all LEDs are driven full on.
OUR EVALUATION RESULTS:
These servo controllers work well for controlling multiple servos and makes connections much easier. Once a servo is set to a particular position with a simple I2C command, the controller takes care of the overhead required to keep the motor updated which frees up the microcontroller to do other stuff.
The header pins that insert into the MCU are the flat sided blade type, so some straightening of the pins is usually required to install the shield onto an MCU.
Servos expect to see a pulse about every 20mSec and the width of the pulse tells the servo where it should position its shaft. Most standard servos have a position range of approximately 0-180 degrees. They typically detect a pulse width of about 1mSec to be 0 degrees and a pulse width of 2mSec to be 180 degrees. Any pulse widths in-between these values can be used to set the servo to an arbitrary position. For instance, a pulse width of 1.5mSec will set the shaft to 90 degrees, 1.75mSec will be 135 degrees, etc.
The exact range of the servo can vary quite a bit between different types of servos. Instead of 0-180 degrees, some may only go 20-160 while others may go farther than 180. Interpretation of the pulse width such as 1.5mSec being 90 degrees can also vary quite a bit between servos. Some experimentation is generally needed to characterize the servos that you are using. In general, you don’t want the servos to be driven past a position that they can get to as that causes high stall currents and may damage the gears in the servo overtime. In the program below, there are two constants MIN_VALUE and MAX_VALUE that set the limits for the motor. These can be adjusted to suit the servos that you are working with.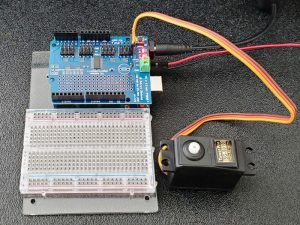
To use this controller, you must initially set the PWM frequency which will remain constant. To generate a pulse every 20mSec as the servo expects requires a 50-60Hz PWM frequency to be set.
You then need to set the pulse width to move the servo to the position that you want it to be in. The PWM outputs are 12-bit which means their setting (pulse width) can range from 0-4096 which covers the range of 0 – 20mSec. If you have a 20mSec pulse width / 4096, the output has a resolution of about 4.88uSec, so if you want a 1.5mSec pulse width, that would be a setting of about 1.5mSec / .00488mSec = 307.
The program below uses the Adafruit_PWMServo library, so be sure to load it to use this program. It can be downloaded via the Arduino IDE.
The program simply exercises a single servo on channel 0 to verify the shield is basically working, but this can be changed to any channel by modifying this statement int servonum = 0;
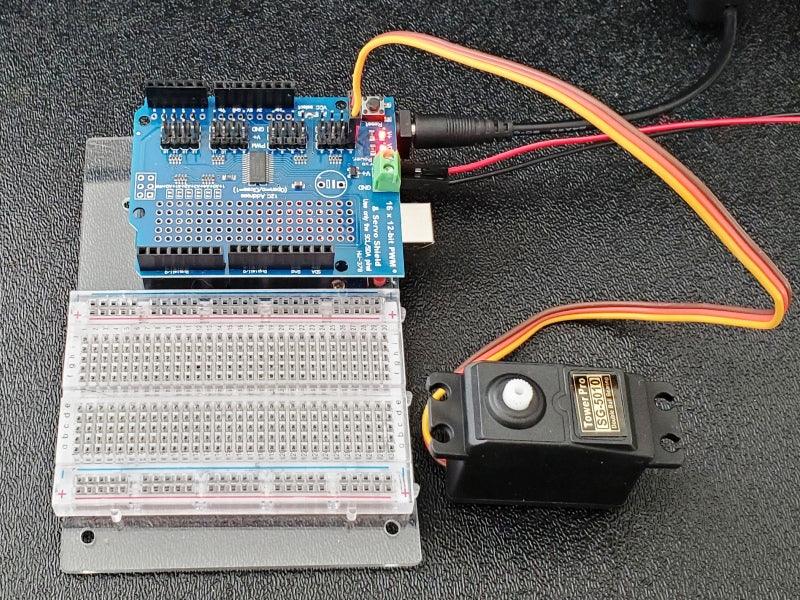
Simply plug the shield into an Uno or compatible board and hook up 5V/Gnd to the screw terminal connections. Plug a servo into the channel 0 header. Ensure the PWM wire which is usually orange in color is plugged into the PWM pin. Both LEDs on the shield should be lit indicating both the board and servo have power. Once the program is downloaded, the servo should start cycling.
16-Channel PWM Servo Controller Program
/*
  Exercise the PCA9685 Servo motor controller
  Rotates a single servo on channel 0 back and forth to test basic operation

  Uses Adafruit_PWMServoDriver.h library
*/

#include <Wire.h>
#include <Adafruit_PWMServoDriver.h>

Adafruit_PWMServoDriver pwm = Adafruit_PWMServoDriver(0x40);

#define SERVOMIN  100 // this is the 'minimum' pulse length count (out of 4096)
#define SERVOMAX  440 // this is the 'maximum' pulse length count (out of 4096)

// Set for servo channel to test
int servonum = 0;
//===============================================================================
//  Initialization
//===============================================================================
void setup() {
  Serial.begin(9600);
  Serial.println("Channel 0 Servo test");

  pwm.begin();
  pwm.setPWMFreq(60);
  delay(10);
}
//===============================================================================
//  Main
//===============================================================================
void loop() {
  // Drive servo forward then back.
  for (int pulselen = SERVOMIN; pulselen < SERVOMAX; pulselen++) {
    pwm.setPWM(servonum, 0, pulselen);
  }
  delay(500);

  for (int pulselen = SERVOMAX; pulselen > SERVOMIN; pulselen--) {
    pwm.setPWM(servonum, 0, pulselen);
  }
  delay(1000);
}
BEFORE THEY ARE SHIPPED, THESE MODULES ARE:
- Inspected
- Basic functionality tested with 1 Servo motor
- Packaged in high quality resealable ESD bag.
Notes:
- The pins on these shields are flat-sided, so they bend easily and may need a little straightening before inserting into a board.
TECHNICAL SPECIFICATIONS
| Operating Ratings | ||
| Voltage (VCC) | 3.3 or 5V | |
| Voltage (V+) | 4.8-6VDC (5V Typical) | |
| Current (idle) | 6mA (typical) | |
| Current (PWM Controller only) | 400mA (max) | |
| Current (Max w/ Servos) | Depends on servos used and limited by current capability of V+ power supply. | |
| Dimensions | ||
| PCB L x W | 69 x 54mm (2.7 x 2.1″) | |
| Country of Origin | China | |
| Datasheet | PCA9685 |


