Keszoox
2-Axis Pan and Tilt Mount Kit
2-Axis Pan and Tilt Mount Kit
Couldn't load pickup availability
Used with two SG90 servos to provide up/down and left/right axis of motion.
DESCRIPTION
This 2-Axis Pan and Tilt Mount Kit can hold 2 SG90 servo motors and provide up to 180 degree panning and tilting movement of the attached bracket. The bracket is designed to mount a small camera, but it can be modified to mount other items such as ultrasonic sensors to allow the sensor to look around at it’s surroundings.
PACKAGE INCLUDES:
- Plastic mount components (4)
- Servo horns (2)
- Hardware for assembly
KEY FEATURES OF 2-AXIS PAN AND TILT MOUNT KIT:
- 2-Axis of movement – Pan left/right and up/down
- Mounts 2 SG90 Servo motors
The SG90 servos are not included as part of the kit, but they can be bought down below if they are needed for your project. Note that the MG90 servos with metal gears have a thicker mounting flange, so they do not work with these mounts unless you are willing to do some modification.
Here is a short video of the mount in operation. One of our joystick modules is being used to control the position of the 2 servo motors that move the mount.
ASSEMBLY INSTRUCTIONS:
The assembly is fairly straightforward. The kit has a packet of small parts. Most will be used but the two longest screws, nuts and plastic spacers are not needed for the basic assembly and can be used for mounting the base to something if desired. The servos will come with additional hardware which will be used to mount the horns to the servos.
The main thing to pay attention to is that the servos are positioned within their range during assembly to ensure the full range of motion is maintained of the final assembly.
Here are the parts in the kit that you will be working with. You can click on the pics to enlarge.
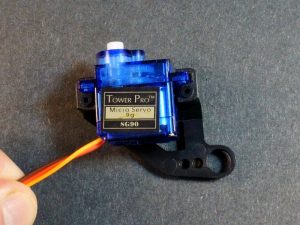
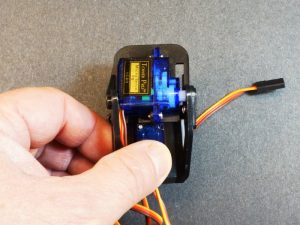
First find the 2 pieces that are used to sandwich one of the servos. Note the orientation of the servo to the plastic pieces.
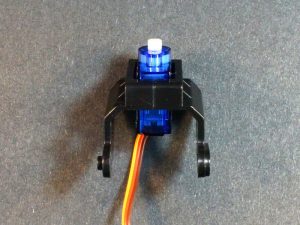
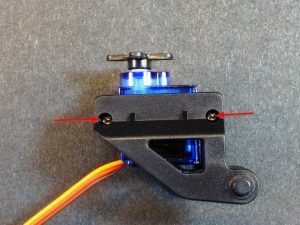
Attached the two halves together using 2 of the longer self tapping screws.
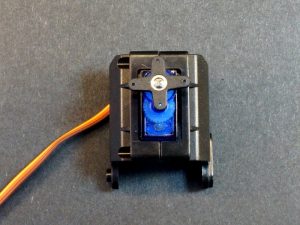
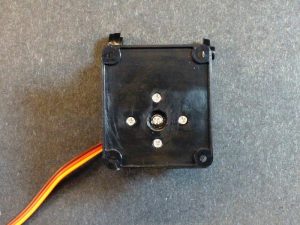
Next you will install the star horn on the servo shaft. This horn will fit into the star shaped depression in the bottom of the base. The star looks symmetrical, but 2 of the arms are slightly longer than the other two. The longer arms go front to back on the base to help ensure the mounting holes line up properly.
You will want to temporarily mount the horn on the servo and rotate it by hand to ensure that it is positioned so that when the servo is centered in its travel, the longer arms of the horn go front to back on the servo and therefore will go front to back in the base as well. This is to ensure that there is equal amount of travel when panning left to right.
Attach the horn to the servo with one of the shouldered screws that came with the servo. Then attach the star horn into the base using the smallest screws that came with the kit. There may be 3 or 4 in the kit. 3 will hold fine.
Note: You can alternatively mount the star horn into the base first and then attach the servo to it, whichever you find easiest.
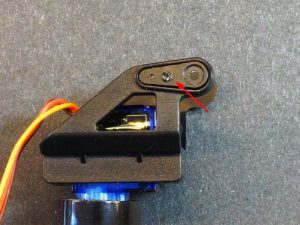
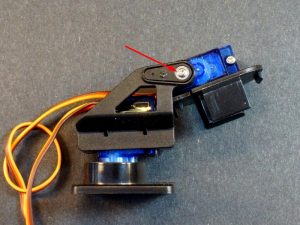
Next install the single arm horn that came with the kit as shown below. Use one of the smaller screws to attach the horn from the inside
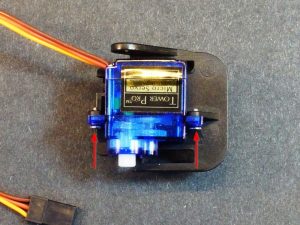
Now install the second servo into the bottom of the tilt bracket oriented as shown below. Use the two shorter machine screws to attach the servo to the bracket.
Last step is to attached the tilt bracket to the base we built earlier. Again, you’ll want to pay attention to the position of the servo shaft to ensure you have full motion of the tilt bracket. If you rotate the servo all the way CCW and install the tilt bracket with it facing down as shown in the pics, that should get you close.
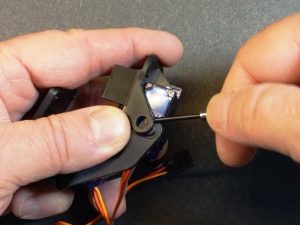
Insert the tilt bracket servo shaft into the single horn we installed in the last step, then use a small screwdriver to slip the hole in the other side over the pivot pin as shown.
Finally attach the single arm horn to the servo shaft using one of the shouldered screws that came with that servo.
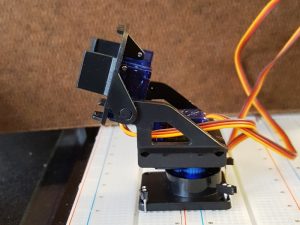
That completes the assembly. With any luck, it will look similar to this.
OUR EVALUATION RESULTS:
These provide a nice inexpensive way to experiment with position controls and are useful for mounting ultrasonic sensors and similar modules where you want to have some direction control or maybe mount a laser pointer to mess with the cat.
The tilt bracket has two flanges that stick out. These may need to be modified depending on what you are mounting to the tilt bracket. The plastic is fairly easy to scribe & break, cut or drill as needed.
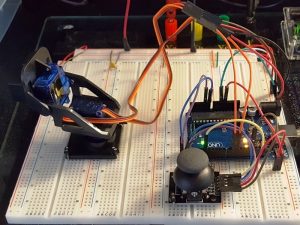
The program below utilizes one of our joystick modules to control the position of the two servos on the mount as shown in the video above. As it is setup, the joystick X-axis controls the left/right pan and the Y-axis controls the up/down tilt.
The servo power should be run off a separate supply and not from the Arduino power. The joystick power however should come from the Arduino to ensure the analog inputs to the ADC don’t have electrical noise from the servos on them. If the joystick is run off the same power as the servos, the electrical noise will couple into the ADC and cause erratic operation of the servos such as twitching when there are no inputs being given.
There are 5 connections to the Arduino. The X-axis / pan servo attaches to pins 9. The Y-axis / tilt servo connects to pin 10.
The joystick X-axis connects to pin A1. The Y-axis connects to pin A0.
The joystick button connects to pin 2 but it isn’t actually used anywhere in the program.
As with any of these programs, the pins are arbitrary. You just need to make sure the servos are connected to PWM capable pins and the joystick X/Y outputs are connected to analog input pins and then redefine the pins used in the program below.
There are a lot of Serial.print statements so you can monitor what is happening by using the Serial Monitor window.
The program uses the Servo.h library which comes with the Arduino IDE to do most of the heavy-lifting for us.
2-Axis Pan and Tilt Mount With Joystick Control Program
/*
  2-Axis Pan Tilt Mount with Servos and Joystick control

  This software utilizes a joystick control module to control 2 servos
  that are mounted on a pan / tilt bracket
*/
#include "Servo.h"
int const X_SERVO_PIN = 9;   // Can use any PWM pin
int const Y_SERVO_PIN = 10;  // Can use any PWM pin
int const X_PIN = A1;        // Use any analog input pin to read joystick X-Axis pot
int const Y_PIN = A0;        // Use any analog input pin to read joystick Y-Axis pot
int const BTN_PIN = 2;       // Use any digital input pin to monitor joystick button
int const X_MIN_VALUE = 10;   // Minimum X Servo position
int const X_MAX_VALUE = 180;  // Maximum X Servo position
int const Y_MIN_VALUE = 0;    // Minimum Y Servo position
int const Y_MAX_VALUE = 180;  // Maximum Y Servo position

int xPosition = 0;          // Variable to hold current X-Axis reading
int yPosition = 0;          // Variable to hold current Y-Axis reading
int buttonState = 0;        // Variable to hold current button state
int x_servo_pos = 0;       // Current X servo position
int x_servo_pos_old = 0;   // Used to hold old X servo position to look for change.
int y_servo_pos = 0;       // Current Y servo position
int y_servo_pos_old = 0;   // Used to hold old Y servo position to look for change.

Servo x_servo;       // creates servo object used to control the X axis servo motor
Servo y_servo;       // creates servo object used to control the Y axis servo motor
//===============================================================================
//  Initialization
//===============================================================================
void setup()
{
  x_servo.attach(X_SERVO_PIN); // assigns PWM pin to the X / Pan servo object
  y_servo.attach(Y_SERVO_PIN); // assigns PWM pin to the Y / Tilt servo object

  pinMode(BTN_PIN, INPUT_PULLUP);   // Enables pull-up resistor on button pin
  Serial.begin(9600);
}

//===============================================================================
//  Main
//===============================================================================
void loop()
{
  xPosition = analogRead(X_PIN);         // Read the current state of all 3 joystick controls
  yPosition = analogRead(Y_PIN);
  buttonState = digitalRead(BTN_PIN);

  //Serial.print(" | Button: ");
  //Serial.println(buttonState);

  x_servo_pos = map(xPosition, 0, 1023, X_MIN_VALUE, X_MAX_VALUE); // remap pot value to servo value
  if (x_servo_pos != x_servo_pos_old) {   // Only do something if there's a change in the X servo position
    x_servo.write(x_servo_pos);           // Update X servo position
    Serial.print("X: ");                  // Print new state out to Serial Monitor window
    Serial.print(xPosition);
    Serial.print("tServo Position: ");
    Serial.println(x_servo_pos);
    x_servo_pos_old = x_servo_pos;
  }
  y_servo_pos = map(yPosition, 0, 1023, Y_MIN_VALUE, Y_MAX_VALUE); // remap pot value to servo value
  if (y_servo_pos != y_servo_pos_old) {   // Only do something if there's a change in the Y servo position
    y_servo.write(y_servo_pos);           // Update Y servo position
    Serial.print("Y: ");                  // Print new state out to Serial Monitor window
    Serial.print(yPosition);
    Serial.print("tServo Position: ");
    Serial.println(y_servo_pos);
    y_servo_pos_old = y_servo_pos;
  }
  delay(10);   // add some delay between reads.
}
BEFORE THEY ARE SHIPPED, THESE MODULES ARE:
- Sample inspected per incoming shipment.
Notes:
- None
TECHNICAL SPECIFICATIONS
| Servo Compatibility | SG90 Series | |
| Material | Plastic | |
| Dimensions | L x W x H (assembled) | 60mm x 40mm x 73mm (2.4 x 1.6 x 2.9″) |
Share


