Keszoox
Ratcheting Terminal Crimper SN-01BM
Ratcheting Terminal Crimper SN-01BM
Couldn't load pickup availability
Ratcheting crimper for JST or Dupont breadboard terminals.
Description
These ratcheting crimpers by IWISS feature good quality wire EDM carbon steel crimping jaws along with a ratcheting action to ensure good consistent crimps. It works well when working with the standard 2.54mm ‘DuPont’ style pins used for making breadboard jumpers. They can also be used for crimping many similar small uninsulated pin in the 2.0mm to 2.54mm range like JST terminals.
PACKAGE INCLUDES:
- IWISS Ratcheting Terminal Crimper SN-01BM
KEY FEATURES OF RATCHING TERMINAL CRIMPER:
- Ratcheting design ensures full crimp cycle is completed for crimp consistency
- Crimps 2.54 Dupont style, PH2,0, XH2.54, XH and similar small uninsulated connectors
- Handles 28 to 20 gauge wire (0.08mm – 0.5mm)
- Wire EDM cutting jaws made from carbon steel
These ratcheting crimping pliers have a crimping range of 28-20AWG wire. They are designed for use with smaller uninsulated terminals including male or female XH2.54, PH2.0, KF2510, JST, Dupont and many smaller Molex type terminals in order to make custom cables or jumpers.
Ratcheting style crimpers ensure consistent crimping pressure as they must be cycled through their full range for the jaws to crimp and then release the terminal.
Precision wire EDM jaws ensure good consistent formation of the crimp. Wire EDM is a method of ‘machining’ the saws using Electrical Discharge Machining. EDM uses an electrical spark process to vaporize the material to be removed rather than cutting or grinding.
The crimpers feature removable jaws that can be unscrewed and reversed should you find it more natural to change which side the wire enters from such as being left vs. right handed.
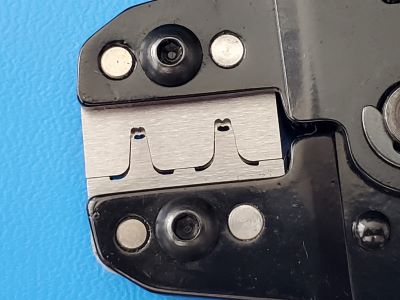
The crimpers have two jaw openings with slightly different sizes. The smaller opening on the left in the picture is for 28-24AWG wire and the larger opening on the right is for 24-20AWG wire. You will also notice that the openings have a larger side which is facing us in this picture and a smaller side. The larger side is the side that the wire enters from and crimps the terminal to the insulation of the wire. The smaller side takes care of crimping the terminal to the stripped copper portion of the wire.
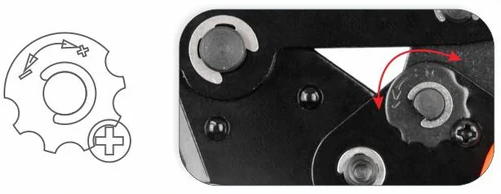
The crimping force can be adjusted if desired. The locking screw is removed and the adjustment is turned clockwise to increase the pressure and counter-clockwise to reduce it. The screw is then reinstalled to lock the adjustment in position. Typically the default setting works fine.
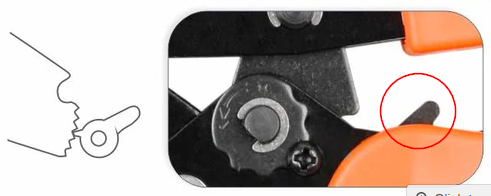
There is an anti-stuck trigger that will release the jaws partway through the crimp cycle. This is exercised by applying slight pressure to the handles and pushing on the small trigger finger to release the rachet.
USING THE RATCHETING TERMINAL CRIMPER:
There are very nice ratcheting crimpers and what we use to create our own cables.
In the example here, we are crimping typical 2.54mm ‘DuPont’ style breadboard terminals, but most terminals will follow the same basic process.
Strip the Wire
The wire should have approximately 0.1″ (2.5 – 3.0mm) of insulation stripped before crimping. This can vary slightly depending on the terminals you are working with.
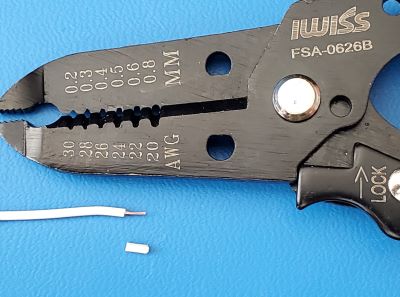
When stripping wire, you want to be sure not to use too small of jaw opening to avoid accidentally cutting not only the insulation but also some of the copper conductors. When first using a stripper and especially if you are unsure of the AWG wire in hand, it is best to error on trying to use too large of opening and then move to a smaller size if the insulation is not cut cleanly through.
If the exposed copper wire threads are frayed out after stripping, slightly twist the strands back together with your fingers to make a tight bundle again.
Prepare the Terminal For Crimping
Many terminals will come on strips. It is typically easiest to handle the terminal during the crimping process by cutting the strip and leaving the metal tab attached for now.
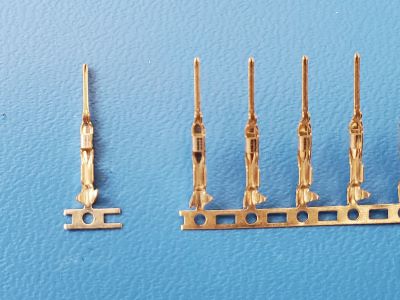
Insert the Terminal into Crimper
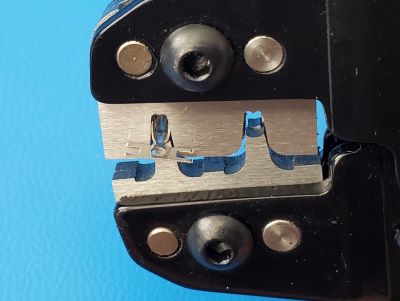
Breadboard jumper wire is typically 26AWG, so we will be using the smaller of the two jaw openings to make our crimp.
Insert the terminal so that the wire end with the tab attached is located in the larger portion of the jaws, then partially close the jaws to hold the terminal in place as shown here.
Insert the Wire
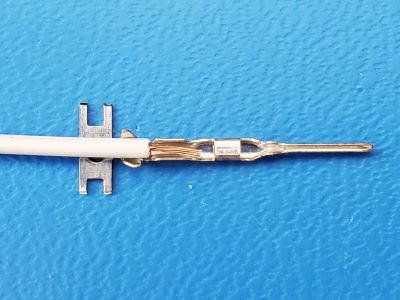
When you insert the wire, the insulation will go pass the first larger part of the jaw opening that crimps the insulation, while the copper wire will extend into the smaller part of the jaw opening that crimps onto the copper wire itself. Proper wire alignment is shown here outside the crimper for easier visibility.
Make the Crimp
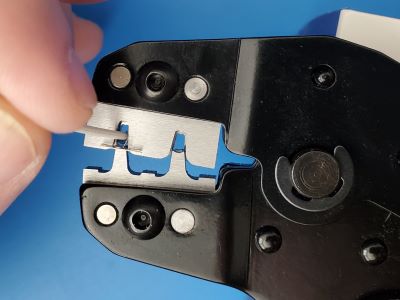
Finally, complete the crimping action by squeezing the crimper handles until the ratcheting action completes and the jaws open.
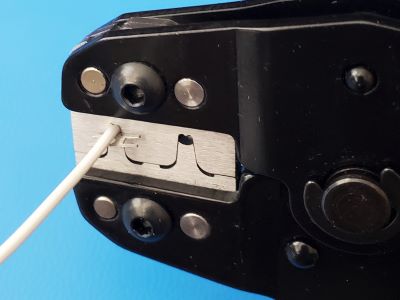
The final crimp should end up looking something like the picture below. The insulation should be captured under the first part of the terminal and the copper wire captured under the second part of the terminal. Give the wire and terminal a firm tug to make sure that the crimp is solid.
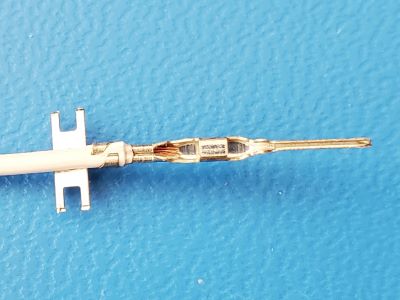
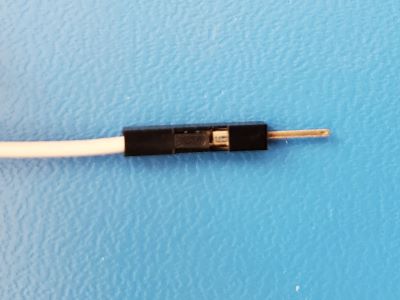
Finally trim the tab off the terminal by either cutting it with flush cutter pliers or bending it back and forth a couple of times until it breaks off. Then insert the terminal into the housing of your choice.
Finding the optimum crimping setup may take a little trial and error, so it is usually best to do a practice run or two to get familiar with the tool, terminal and wire you are using. A problem that is sometimes run into is that the crimped terminal does not want to insert into the housing properly. This is usually a sign that the terminal is either being over crimped and thus flattening it it out excessively and making it wider than the housing or perhaps it is being under crimped and so not reduced in diameter enough to fit. This is a common problem with cheaper crimpers that use cast jaws that are less precise in their crimping action. With these crimper, it may be a sign that you need to move to the larger or smaller slot.
Notes:
- None
Technical Specifications
| Dimensions | L x W x H (closed) | 195 x 18 x 76 mm (7.7 x 0.7 x 3″ ) |
| Color | Black with orange and gray handle | |
| Wire Gauge | Crimping range | 28-20AWG |
Share


